
Step by step Migration of SQL DB to Azure SQL Managed Instance with the help of Azure Data Migration Service – Part 1
As you are aware in my last post I have shown you the steps to create the Azure SQL Managed instance, today I will show you how you can migrate SQL databases easily to SQL managed instance.
For our PoC we have used the Azure DMS tool.
What is Azure Data Migration Service?
Azure Database Migration Service enables seamless migrations from multiple database sources to Azure Data platforms with minimal downtime. The service uses the Data Migration Assistant to generate assessment reports that provide recommendations to guide you through the changes required prior to performing a migration. When you’re ready to begin the migration process, the Azure Database Migration Service performs all of the required steps.
Why I have selected the DMS is that DMS support the Azure SQL Managed Instance as you can see below.

In the first step we need to register the Azure Data Migration Service.
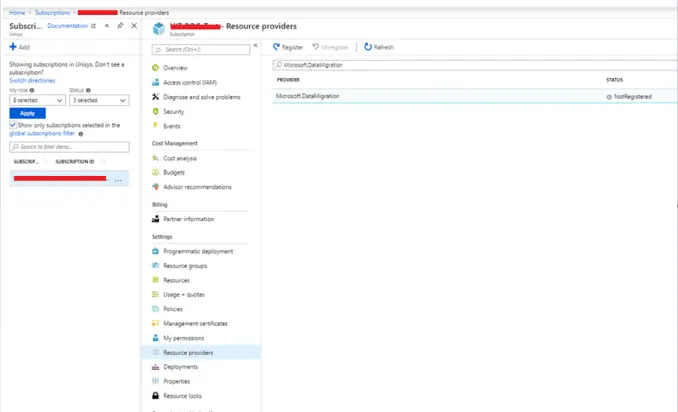
Click on the register button in the top.

You can find the status as showing registering as you can see above. After waiting for couple of minutes it should show as registered as you can see below.

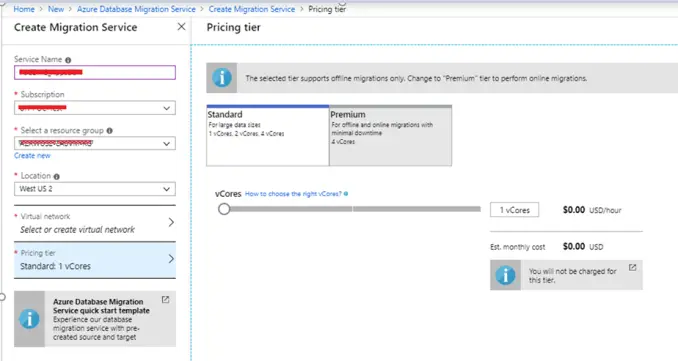
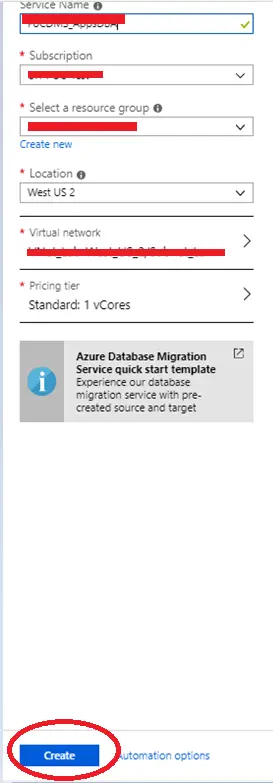
Next step is to create the Azure data migration service
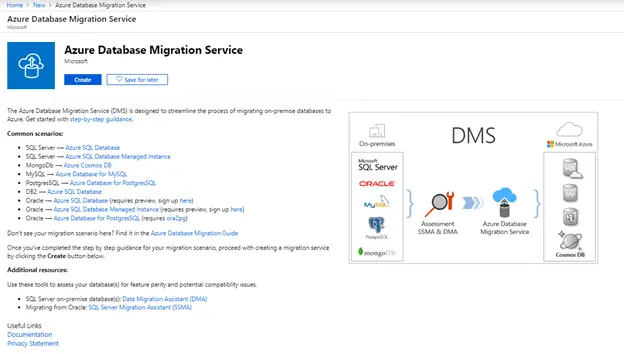
We have selected the Standard Tier, this is free of cost as of now as you can find below.
In the next step click on the create button
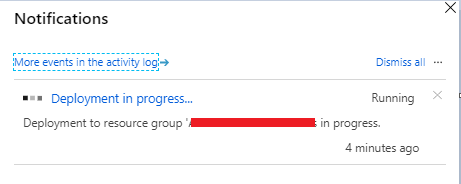
You can see the deployment in progress.
In the next step you find the deployment is completed, as shown below.
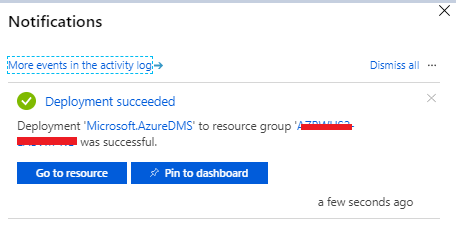
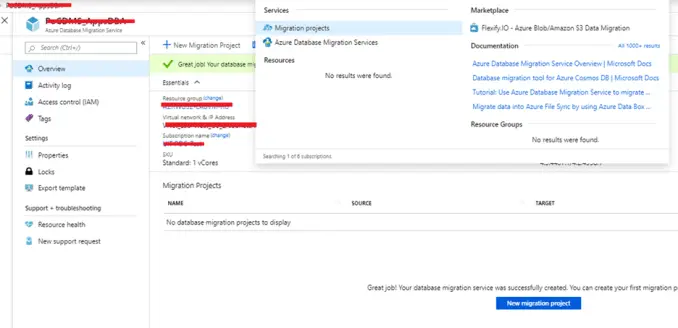
Now you can see below the DMS service is created. J

Step by step Migration of SQL DB to Azure SQL Managed Instance with the help of Azure Data Migration Service – Part 2
In this 2nd part I will show you how you can actually migrate the database.
As you have seen in the last post once the DMS is created, it will show like this below.
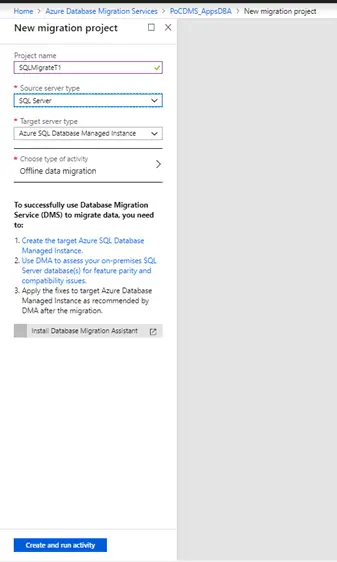
In the next step you need to create New Migration Project. You should click on new migration project. Once you will click on that it will show you this dialog box as you can show below.
And in next step you need to give the source of the SQL Server instance from where you need to migrate the database.
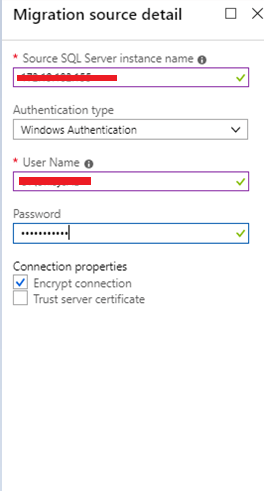
Since the source server connection data I would like to encrypt during transit so I have selected this option

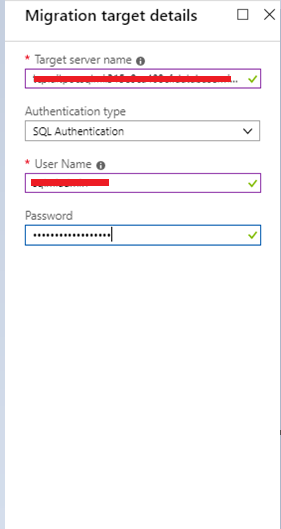
In the next step you need to specify the target database instance which is our SQL Managed Instance in Azure as you can see below
Now in next step you need to select the database in the source SQL server instance which you would like to migrate.
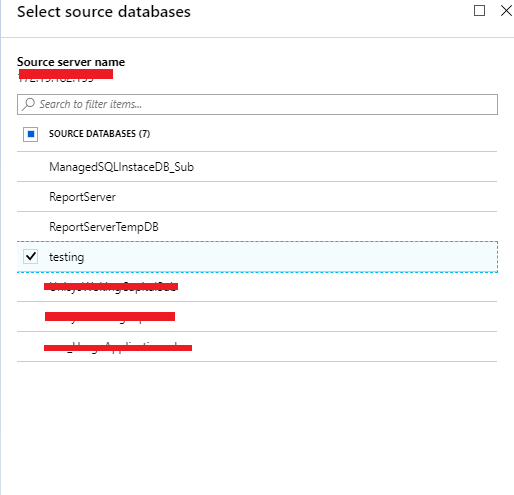
Please note that the maximum number of instance which is currently supported in the Azure SQL Managed instance is 100.
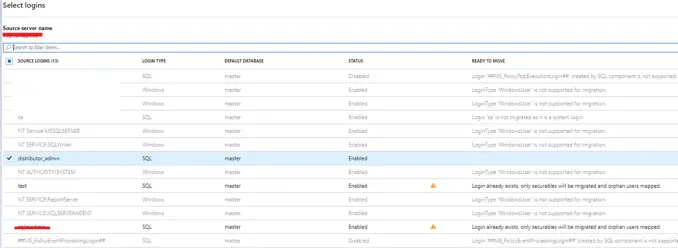
In the next step you need to select the SQL logins
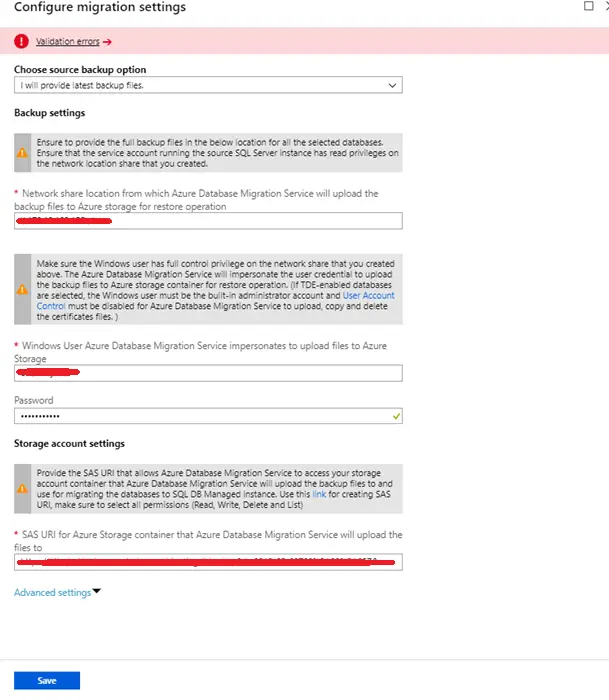
And the 5th step you need to configure the migration settings as you can see below
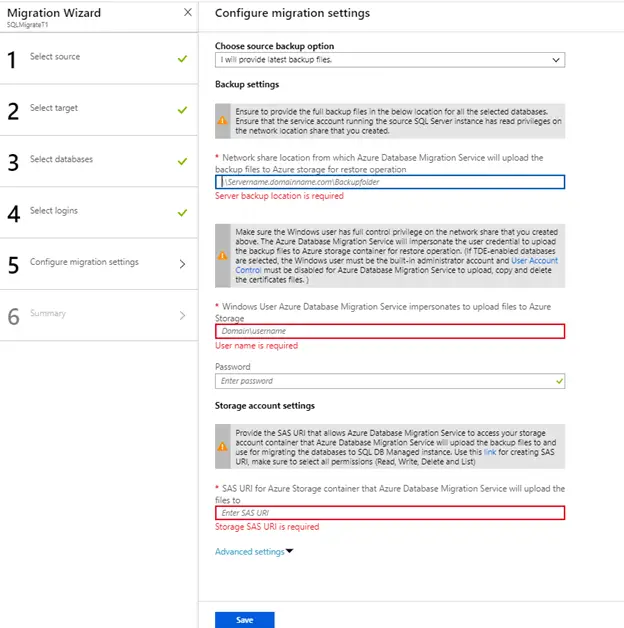
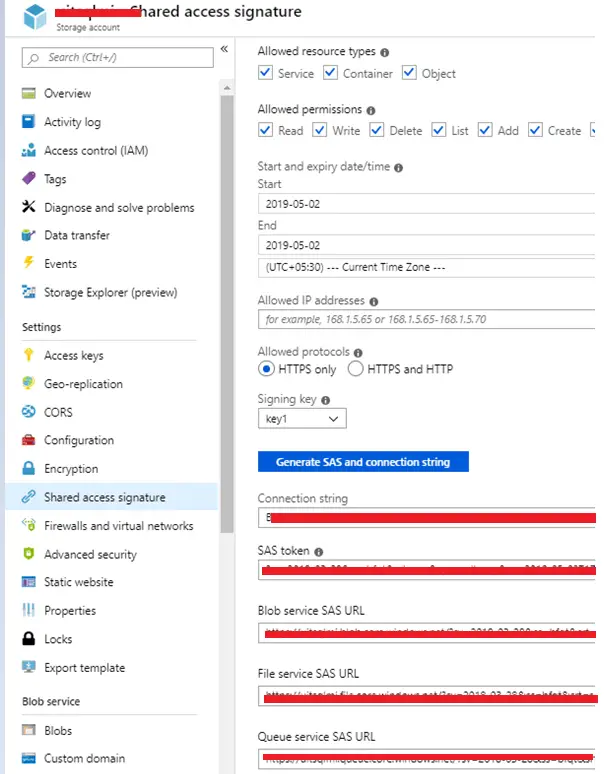
One of the important thing here is to create a storage account with SAS URI and provide the SAS token in the URL as you can see below
Once everything is completed the migration settings should look like the following.
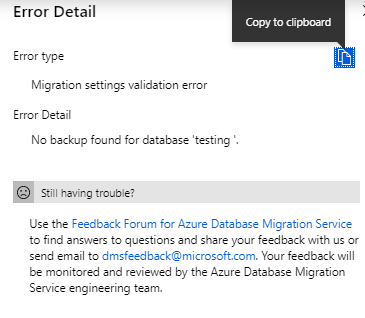
As you can see above I got a validation error since the backup of the source SQL server database was not present in the above location.
The error is showing here.
Once I bypass that error by keeping backup of the SQL server, the next step is follows
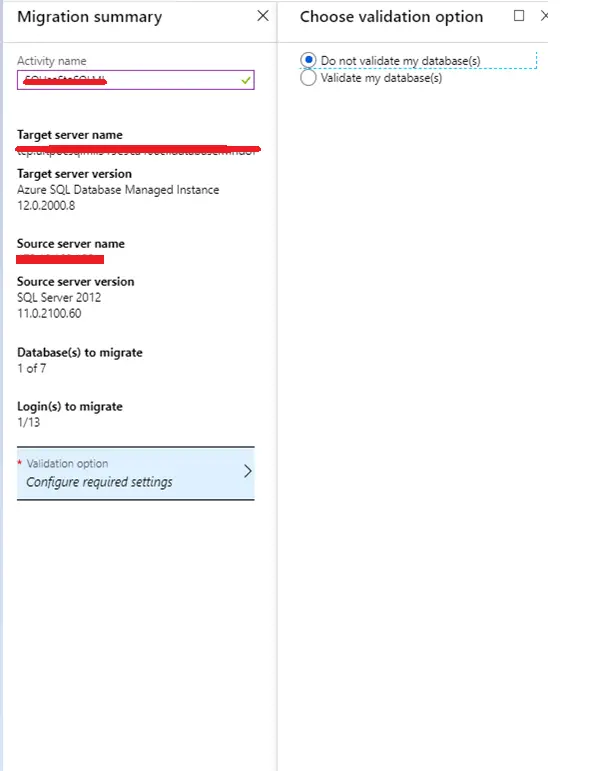
In the next step, I ran the migration as you can see below

In the final step, you can see the status of the migration
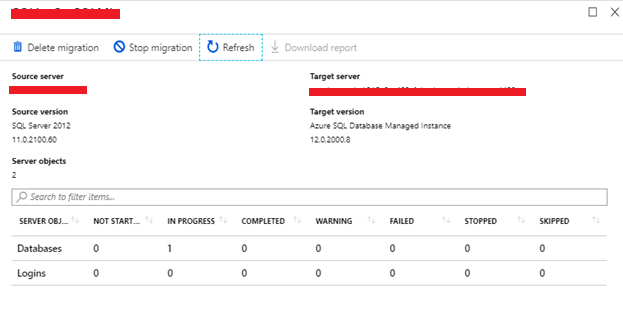
After some time you can find the status as follows
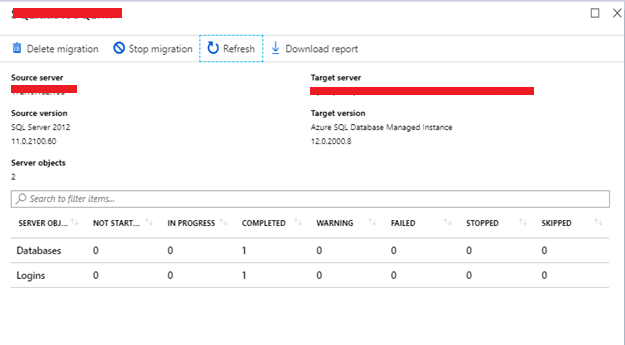
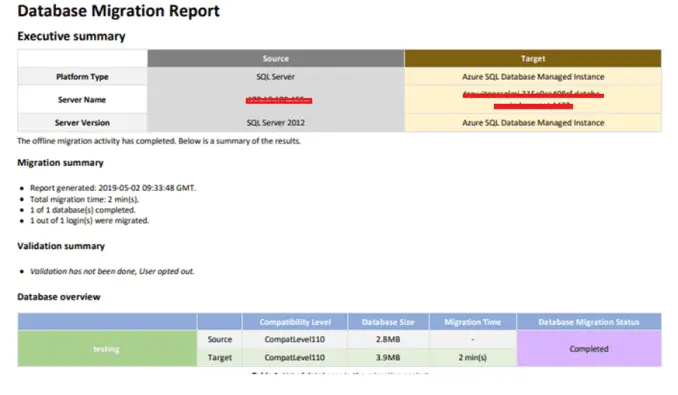
After some time, you can see that the migration is completed. For more details, you can check the migration report.
That’s all about the migration of SQL databases from Azure IAAS or On-Premises SQL server instance to Azure SQL Managed instance with the help of Data Migration Tool. I hope you have liked this post. Stay tuned for more posts similar to this in the future.
Have a great day ahead.
