
Tutorial: Install Harbor for Image Vulnerability Scanning

Given Docker Hub’s new throttling limits for containers, some companies might opt to host their own repositories. That’s a great option if you have the infrastructure to make it happen. Of course, with the help of Linux, it can be done fairly easily and on the cheap.
But what about adding a layer of security on top of that registry? The type of security to which I’m referring is one that protects you and your company from the hidden dangers found within the images your containers are based on. How do you know if the images your registry is serving up are free from vulnerabilities? Even if you roll those images in-house, your developers could unwittingly add packages that include bugs and other types of weaknesses (or worse, malicious code)?
Without the means of detecting those vulnerabilities, your company is, well, vulnerable.
That’s where a tool like Harbor comes in. Harbor is an open source, trusted cloud native registry you can deploy to either your in-house data center or to a Linux server on your hosted cloud. Harbor allows you to sign, store, and scan your images.
I want to show you how to install Harbor on Ubuntu Server 20.04. In order to successfully deploy Harbor, you’ll need:
- An running, updated instance of Ubuntu Server 20.04.
- A user account with sudo privileges.
Let’s get to work.
Install Necessary Dependencies
In order to install Harbor, we’ll need both Docker and docker-compose installed on the machine. To install Docker, log into the server and issue the command:
sudo apt-get install docker.io -yOnce that installation completes, start and enable the service with the commands:
sudo systemctl start docker
sudo systemctl enable docker
Add your user to the docker group with the command:
sudo usermod -aG docker $USEREnable the group change with the command:
newgrp dockerNext we need to install docker-compose. This is done with the following commands:
sudo curl -L https://github.com/docker/compose/releases/download/1.27.4/docker-compose-uname -s-uname -m -o /usr/local/bin/docker-composesudo chmod +x /usr/local/bin/docker-composeFinally, install NGINX with the command:
sudo apt-get install nginx -yStart and enable the NGINX service with the commands:
sudo systemctl start nginx
sudo systemctl enable nginx
Download and Unpack the Harbor Installer
We can now download and unpack the Harbor installer. Download the latest version with the command:
wget https://github.com/goharbor/harbor/releases/download/v1.10.6/harbor-offline-installer-v1.10.6.tgzAfter the file downloads, unpack it with the command:
tar xvzf harbor-offline-installer-v1.10.6.tgzChange into the newly created directory with the command:
cd harborGenerate the Necessary Certificates
Harbor cannot function correctly without SSL keys. If you’re using Harbor in a production environment, you’ll want to use certificates from a trusted CA. Since we’re demonstrating for testing purposes, we’ll generate self-signed certificates.
To generate your certificates, issue the command:
openssl req -newkey rsa:4096 -nodes -sha256 -keyout ca.key -x509 -days 3650 -out ca.crtYou’ll be asked to answer a few simple questions, regarding the location of the server. After the generation completes, generate the signing request with the command:
openssl req -newkey rsa:4096 -nodes -sha256 -keyout SERVER -out SERVERWhere SERVER is either your server domain or IP address.
Again, make sure to answer the questions for the generation of the signing request.
Next, we must create a config file for the Subject Alternate Name. Create this file with the command:
nano extfile.cnfIn that file, paste the following:
subjectAltName = IP:SERVERWhere SERVER is the domain or IP address of your Harbor server.
Save and close the file.
Generate the certificate file with the command:
openssl x509 -req -days 3650 -in SERVER -CA ca.crt -CAkey ca.key -CAcreateserial -extfile extfile.cnf -out SERVERWhere SERVER is either the domain or IP address of your hosting server.
Create the client key with the command:
openssl req -new -x509 -text -key ca.key -out ca.certCreate a new directory to house the certificates with the command:
sudo mkdir /etc/docker/certs.dYou’ll also need to create a sub-directory, with the same name as either your server domain or IP address with the command:
sudo mkdir /etc/docker/certs.d/SERVERWhere SERVER is either the domain or IP address of your hosting server.
Copy the newly-generated certificates into the Docker certs directory with the command:
sudo cp *.crt *.key *.cert /etc/docker/certs.d/SERVERWhere SERVER is either the domain or IP address of the hosting server.
Configure the Harbor Installer
Before you can successfully install Harbor, you must first modify the configuration file. Open that file for editing with the command:
nano harbor.ymlHere you need to modify the following options:
- hostname — set this to either the domain or IP address of the hosting server.
- port — set this to 8080.
- harbor_admin_password — set this to a strong, unique password.
- password (in the database configuration section) — change this to a strong, unique password.
Locate the certificate and private_key lines, which will look like:
certificate: /etc/ssl/certs/ca.crt
private_key: /etc/ssl/certs/ca.key
Change those lines to:
certificate: /etc/docker/certs.d/SERVER/ca.crt
private_key: /etc/docker/certs.d/SERVER/ca.key
Where SERVER is either the domain or IP address of the hosting server.
Install Harbor
We can now finally install Harbor. We want to make sure we install Harbor with Clair support (which is the sub-system for scanning images for vulnerabilities). From within the harbor folder, issue the command:
sudo ./install.sh --with-clairThe Harbor installation will take just a couple of minutes to complete. Once it’s done, you can access it by opening a browser and pointing it to https:// SERVER (Where SERVER is either the domain or IP address of the hosting server). When prompted for a login, use admin as the user and the password you configured for the harbor_admin_passsword option in harbor.yml.
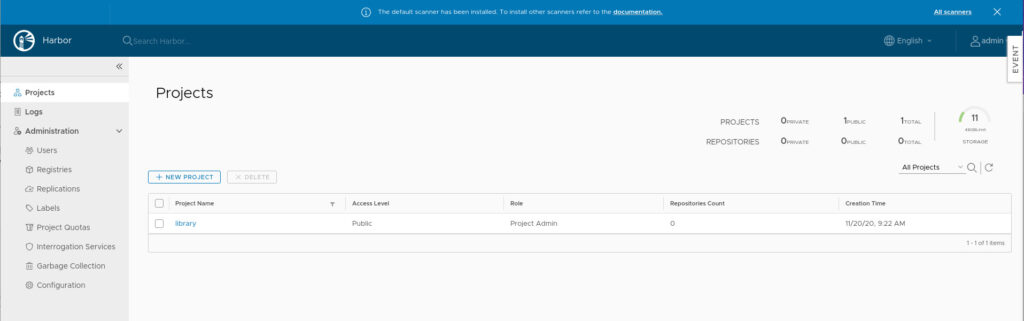
Upon successful authentication, you’ll find yourself at the Harbor dashboard (Figure 1), where you can start putting this outstanding tool to work:
Congratulations, you now have your own company registry that is fully capable of scanning those images for vulnerabilities. You’re one step closer to secure container deployments.
In a future installment, we will take a look around to see how Harbor works.